
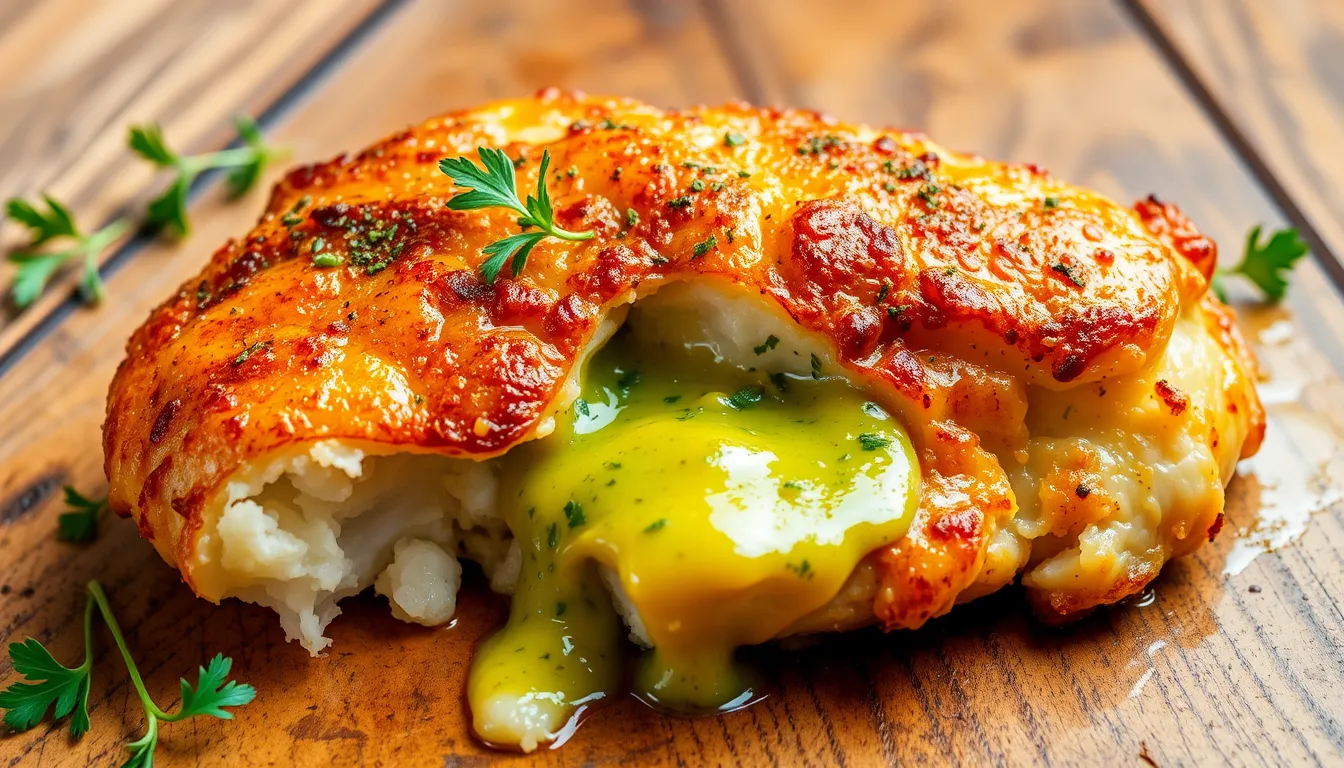
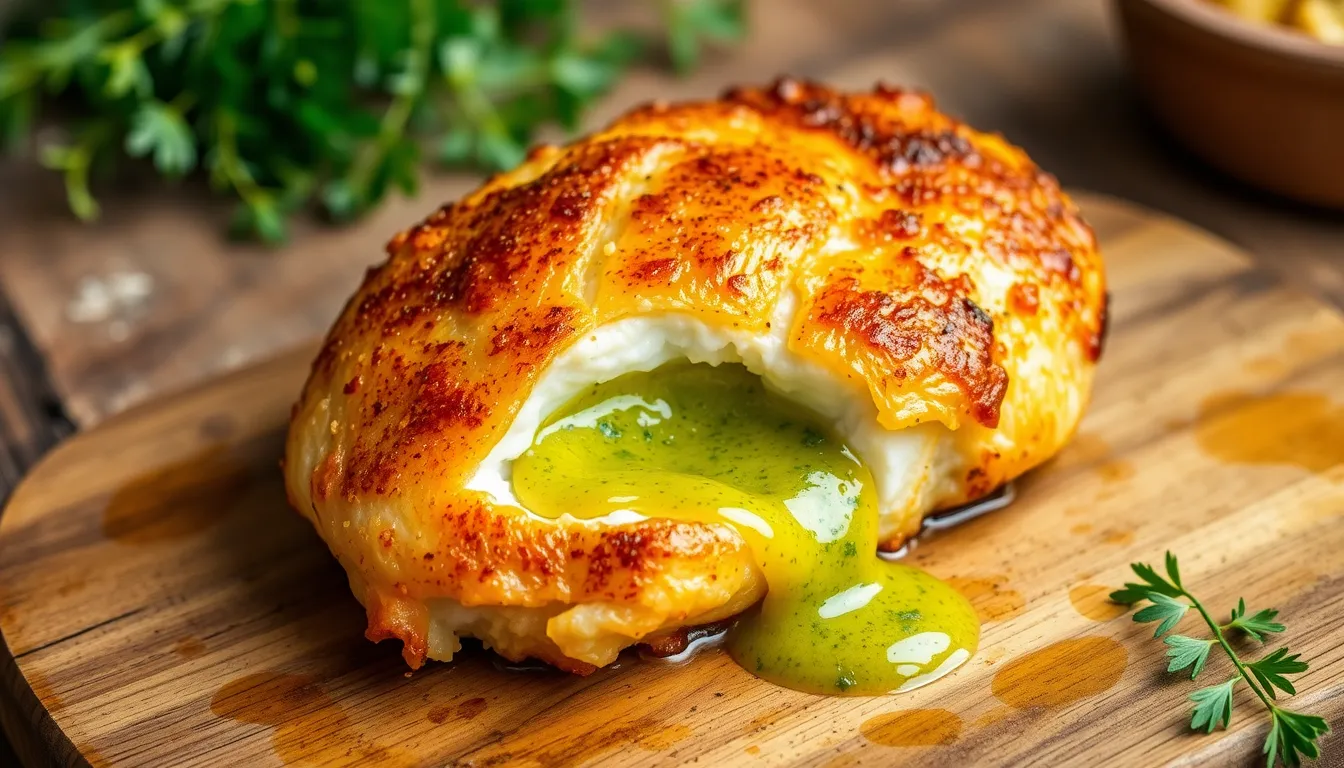
Chicken Kiev is a beloved dish hailing from Ukraine, renowned for its crispy exterior and luscious, buttery center. Traditionally, this dish features chicken breasts pounded thin, rolled around a generous portion of herb-infused garlic butter, and then breaded before frying. The result is a savory delight that captures the essence of Ukrainian cuisine, perfect for any special occasion or a comforting family dinner.
To make an authentic Chicken Kiev, it’s essential to focus on quality ingredients and proper technique. The chicken should be fresh and tender, while the garlic butter must be prepared with care to ensure the perfect flavor balance. The contrast between the crunchy outer layer and the rich, gooey filling is what truly defines this dish and impresses anyone fortunate enough to taste it.
Today, variations of Chicken Kiev exist in numerous restaurants worldwide, but the original Ukrainian recipe remains a culinary treasure. It’s not just about the food; it’s about the heart and tradition that come with it. Each bite tells a story of Ukraine’s rich cultural heritage and its love for hearty, flavorful dishes that warm the soul.
To bring this delicious dish into your kitchen, gather your family and friends, and prepare for a cooking adventure that will not only satisfy your palate but also provide a delightful bonding experience. The following sections will guide you through the necessary ingredients and the meticulous preparation that makes Chicken Kiev so special.
Ingredients for chicken Kiev
To create a tantalizing Chicken Kiev, ensuring you have the right ingredients is crucial. Below is a list detailing everything you will need to achieve the authentic flavor and texture that this iconic dish is known for.
| Ingredient | Quantity | Description |
|---|---|---|
| Chicken breasts | 2 large | Fresh and boneless, skinless, pounded thinly for easy rolling. |
| Unsalted butter | 100 grams (about ½ cup) | Softened to room temperature to create a creamy garlic butter. |
| Fresh garlic | 3-4 cloves | Minced finely for an intense garlic flavor. |
| Fresh parsley | 2 tablespoons | Chopped, to add freshness and a vibrant green color to the butter. |
| Fresh dill | 1 tablespoon | Chopped, optional but adds a traditional Ukrainian flavor. |
| Salt | To taste | Enhances the flavors of the butter and chicken. |
| Pepper | To taste | A pinch of black pepper for a subtle kick. |
| All-purpose flour | ½ cup | For dredging the chicken, creating a crispy coating. |
| Eggs | 2 large | Beaten, for adhesion of the breadcrumbs. |
| Breadcrumbs | 1 cup | Preferably homemade or panko for an extra crunch. |
| Vegetable oil | For frying | Choose a neutral oil with a high smoke point for frying. |
Each ingredient contributes to the final dish’s success, from the tender chicken to the aromatic garlic butter. Prepare these lovely elements with care to ensure that when you assemble and fry your Chicken Kiev, it turns into a mouthwatering experience that brings the tastes of Ukraine to your dining table.
Preparation of homemade garlic butter
Creating the homemade garlic butter is a crucial step that sets the foundation for a delicious Chicken Kiev, elevating the dish with its rich flavor. The process is straightforward, but the quality of the butter and the melting aroma of fresh herbs and garlic will make a significant difference in the final product. Here’s how to prepare this flavorful concoction.
Start by taking 100 grams (about ½ cup) of unsalted butter out of the refrigerator and allowing it to soften at room temperature for about 30 to 60 minutes. The butter should be soft enough to mix easily but not completely melted. This temperature is ideal for blending in the garlic and herbs effectively.
While the butter softens, peel and finely mince 3 to 4 cloves of fresh garlic. Depending on your preference for garlic intensity, you can adjust the quantity; however, it is essential to maintain a strong garlic flavor to balance the richness of the butter.
Next, chop 2 tablespoons of fresh parsley and, if desired, about 1 tablespoon of fresh dill. Both herbs not only bring vibrant color but also enhance the authenticity of the dish, offering a fresh taste that complements the chicken wonderfully. A mix of these herbs is traditional in the preparation of Ukrainian garlic butter and adds that unique touch typical of the cuisine.
Now that all components are ready, take a mixing bowl and combine the softened butter, minced garlic, parsley, and dill. Using a spoon or a spatula, thoroughly mix the ingredients together until well incorporated. You can also add salt and a pinch of black pepper to taste, depending on your preference. This is an excellent opportunity to adjust the seasoning, ensuring the butter is robustly flavored.
Once mixed, scoop the garlic butter onto a sheet of parchment paper or plastic wrap. Shape it into a log by rolling it tightly, twisting the ends to seal. This will help you achieve a well-defined round shape, which will make it easier to slice later. Place the wrapped butter in the refrigerator to firm up, allowing the flavors to meld together. Ideally, let it chill for at least 30 minutes, or until you are ready to use it in your Chicken Kiev preparation.
Homemade garlic butter is not only essential for this dish but can also be used in various recipes, from spreading on fresh bread to melting over grilled vegetables. The rich combination of garlic and herbs will enhance any meal you create, showcasing the heart of Ukrainian culinary tradition.
Steps to prepare chicken Kiev
Now that your garlic butter is ready, it’s time to prepare the Chicken Kiev itself. The steps below will guide you through the process of assembling, breading, and frying the chicken to achieve that perfect crispy exterior and melty garlic-infused center.
Begin by preparing your workspace. You’ll need a clean surface to assemble the chicken, along with three shallow dishes for flour, eggs, and breadcrumbs. Set the stations up in this order: flour on the left, beaten eggs in the center, and breadcrumbs on the right. This method makes the breading process much more efficient.
Next, take your pounded chicken breasts and lay them flat on the workspace. If you haven’t already, slice your hardened garlic butter log into generous pieces. You should aim for a slice of butter that is about one tablespoon in size, though you can adjust this based on your preference for richness. Place one piece of garlic butter in the center of each chicken breast.
To roll the chicken, carefully fold the sides over the butter, then roll from the bottom up to encase the butter completely. Make sure the chicken is rolled snugly to prevent the butter from leaking out during cooking. Once rolled, secure each chicken piece with toothpicks, or use kitchen twine to tie the ends if you prefer a more secure closure. This step helps to maintain the shape and keeps the butter intact as it melts during cooking.
Now it’s time to coat the chicken. First, take the rolled chicken and dredge it in the flour, ensuring it is evenly coated. Shake off any excess flour, then dip it into the beaten eggs. This step will help the breadcrumbs stick. Finally, roll the chicken in the breadcrumbs, pressing gently to ensure a good coating. For a super crispy result, consider double-breading: repeat the egg dip and breadcrumbing process for an additional layer.
After the chicken is well coated, place it on a plate and let it rest for about 10 to 15 minutes. This resting period allows the breading to adhere better during frying and ensures a uniform cooking process.
As you let the chicken rest, heat a sufficient amount of vegetable oil in a frying pan over medium-high heat. You want enough oil to cover the bottom of the pan, but not so much that the chicken is deep-fried. A good rule of thumb is about ½ inch of oil. To test if the oil is hot enough, drop in a small piece of bread; if it sizzles and browns in about 30 seconds, you’re ready to begin frying.
Carefully place the chicken rolls into the hot oil, ensuring not to overcrowd the pan; cook in batches if necessary. Fry each piece for about 4 to 5 minutes on each side, or until golden brown, adjusting the heat as needed to avoid burning. Once they are nicely browned, use tongs to transfer the chicken to a paper towel-lined plate to drain any excess oil.
Congratulations! You are now just moments away from serving a delicious Ukrainian classic. Be diligent in keeping the chicken warm while you continue to fry the remaining pieces. The garlic butter within will melt and flavor the chicken beautifully, providing an experience that showcases the heart of Ukraine’s rich culinary tradition with every bite.
Cooking tips and serving suggestions
After perfecting the cooking process, it’s time to focus on some essential tips and serving suggestions to elevate your Chicken Kiev experience. The right technique can transform your dish from good to unforgettable, while thoughtful presentation can add an appealing touch to your meal.
To enhance the flavor, consider marinating the pounded chicken for about 30 minutes before inserting the garlic butter. A simple marinade of lemon juice, olive oil, and a dash of salt can infuse the chicken with a zesty brightness that pairs beautifully with the rich butter filling.
When frying, always ensure that your oil is at the correct temperature. If the oil is not hot enough, the chicken will absorb excess oil and become greasy; if it’s too hot, the breading may burn before the chicken is cooked through. Opt for a moderate flame and adjust it as needed to maintain consistent temperatures throughout the cooking process.
For added crunch and flavor, various breadcrumbs can be used; panko breadcrumbs provide an incredibly crispy texture, while regular breadcrumbs offer a more traditional crust. You can also enhance the breadcrumbs by mixing in grated Parmesan cheese or dried herbs like oregano or thyme.
For serving, a beautifully arranged plate can make your Chicken Kiev dish even more enticing. Serve the chicken hot alongside a fresh green salad or steamed vegetables for a balanced meal. Roasted potatoes or a classic Ukrainian side dish, such as buckwheat with onions, can complement the richness of the chicken exceptionally well.
Don’t forget the finishing touches! A sprinkle of fresh parsley or dill over your plated Chicken Kiev adds a vibrant pop of color while enhancing the herbaceous aroma. Pair your dish with a light sauce, such as a creamy garlic or herb sauce, which can be drizzled over the chicken for an extra layer of flavor.
Why not elevate your dining experience with a nice wine pairing? A crisp white wine, such as Sauvignon Blanc or a light-bodied Chardonnay, can cut through the richness of the garlic butter, making for a refreshing combination.
Enjoying Chicken Kiev is not just about the dish itself but also the experience that comes with it. Gather your family and friends at the table, dive into the deliciousness together, and indulge in the vibrant flavors and warmth of true Ukrainian cuisine. Every bite of this iconic dish is sure to evoke a sense of joy and connection, making it an unforgettable addition to any meal.